Showing posts with label #embossing. Show all posts

Friday, August 4, 2017

CAS-ual Fridays Stamps Sneak Peek Day 4-"Puffy Heart Love"

It is Friday here and FINALLY you will be able to buy the fabulous stamp sets at the CAS-ual Fridays Stamp Store!!!

Today I am here with a sneak peek to the last new stamp set-"Puffy Heart Love."


For this card I created a background using some oxide inks in pink, yellow and orange. I did a smooshing technique multiple times, drying the background with a heat gun after each pass through the inks.

Next, I stamped the sentiment on vellum using the new CAS-ual Fridays Stamps "Puffy Heart Love" with gold pigment ink and heat embossed it with gold tinsel embossing powder.


I layered the sentiment over the dried background panel and used gold washi tape above and below the vellum to adhere it to the paper. I then adhered the whole panel to a top folding A2 sized card.

The last step was to adhere some sequins in the pink and yellow randomly around the card front. I used Stickles to add a dot of glitter glue inside of each sequin for more sparkle.

Here is a picture of the full "Puffy Heart Love" stamp set:


To get this stamp set, as well as the other stamp sets revealed this week, hop on over to the CAS-ual Fridays Stamps Store. If you used my code-nora2017-you can get 15% off your total order, including sale items!!!


For more examples using this stamp set, please go to the CAS-ual Fridays Stamps Blog. There will be a full set of links for each of the Design Teams blogs. Don't forget to comment so you can be entered into a random drawing to win this new stamp set!!

I appreciate you stopping by today. Have a FABULOUS weekend!!


Thursday, August 3, 2017

CAS-ual Fridays Stamps August Reveal Day 3-"Mermaids"

I hope you are all enjoying the fun reveal this week from CAS-ual Fridays Stamps.

Today is day three of the reveal and I have two cards that I created using the new "Mermaids" stamp set.


For my first card, I used  blue Distress Inks to do a "smooshing" technique to create a blue background on watercolor paper.


I then used pigment ink and white embossing powder to stamp and heat emboss the mermaid silhouette.


I adhered the stamped square to a dry embossed, white, A2 sized card front. I adhered a sentiment strip that I had stamped using the "Breathe" stamp set. I used glossy accents on the bubbles and added a couple of blue sequins for some shine.

My next card made a one layer card using one of the sentiments of the "Mermaids" set and the small shell images.


I first stamped the sentiment three times on with blue ink onto the front of the card. I then covered all three with Glossy Accents.


After that was dry, I randomly stamped shell images around the sentiments. I covered the solid shells with a sparkle pen and Glossy Accents. The finish the card I used some ombre floss to wrap around the top and tie in a bow.

Here is a sneak peek of the whole "Mermaids" stamp set:


This set will go on sale August 4, 2017. If you used nora2017 you can get 15% off your total order-including all sale items!!


Want to see some more projects using this fabulous set? Hop on over to the CAS-ual Fridays Stamps Blog for a complete list of links for the Design Teams blogs!! Don't forget to comment to be entered into a random drawing to win this stamp set.

Tomorrow is our last day of the reveal so do not forget to stop by for one more day!! Thanks for taking the time to peek at my blog today!!


Supplies:


Embossed Mermaids Card
Stamps-CAS-ual Fridays Stamps-”Mermaids,” "Breathe"
Ink-Ranger Ink “Glacier White” Pigment Ink, Ranger “Salty Ocean” Distress Ink, Ranger “Mermaid Lagoon” Distress Ink, Ranger “Tumbled Glass” Distress Ink, Memento "Tuxedo Black

Other-Ranger Ink “Superfine White” Embossing Powder, Wagner Heat Tool, Scrapbook Customs “3 by 3 Acrylic Block,” Taylored Expressions “Snowfall,” Sizzix Big Shot Machine, 3L Scrapbook 3D Adhesive Foam Squares

Shellebrate Card
Stamps-CAS-ual Fridays Stamps-”Mermaids
Ink-Hero Arts "Tide Pool"
Other-Ranger "Glossy Accents," DMC Floss

Saturday, July 1, 2017

A Second Card for CAS(E) this Sketch #228 with Nuvo Glitter Paste

Happy Saturday!! I hope you all are having fun!!

Just a quick drive by to post another card I finished last night for CAS(E) this Sketch #228. I posted my first card last night. I liked how it came out but when I was cleaning up my supplies, another idea just popped into my head and I had to execute it!!


I die cut aPeacock Feather” from white card stock using an Elizabeth Craft die. I then COVERED the feather in "Emerald Green" Nuvo Glitter Paste. I was not sure how I was going to like this but let me tell you-it was SO MUCH FUN TO USE!!!! I used a palate knife to spread it on the delicate die cut and then used Stickles glitter glue for the gold and teal color in the middle of the feather.


While the feather dried, I used an MFT die to die cut the white card front. I then dripped Ranger Ink Distress Spray Stain in Peacock Feathers and Picket Fences over the top. You could not see the white from the Picket Fence Spray so I added some Heidi Swapp "Gold Lame” Color Shine to the mix. I dried it with a heat gun and adhered the misted panel to my favorite teal card stock that is now retired. I used Ranger Ink Multi-Matte to adhere the feather onto the card front.

I then die cut the "hugs" sentiment from my FAVORITE gold card stock EVER. It photographed very badly and I apologize for that. I HOARD this stuff because not only do I love the color gold that it is but it die cuts like butter.
I adhered this on the card and added a stamped sentiment from PTI's Big Hugs stamp set under it, using foam adhesive.


I am in love with how this came out and had a blast using the glitter paste. I had so much fun that I created another card using glitter paste with a stencil but will be posting that later in the week.

Again, I am entering this into CAS(E) this Sketch Challenge #228.


Two cards for one challenge is a first for me!!

Thank you for taking the time to stop by. Have a FABULOUS day!!


Supplies:
(Affiliate Links used when possible at no extra cost to you)

Stamps-PaperTrey Ink “Big Hugs
Paper-Stampin Up! “Taken With Teal” (retired), Neenah Solar White, My Minds Eye “Dark Molasses” Tonic Studios “Christmas Gloss” Mirrored cardstock
Dies-Elizabeth Craft Designs “Peacock Feather,” MFT  Die-namics Blueprints #13, Paper Smooches “Hugs and Kisses

Other-Stickles Glitter Glue-“Peacock” and “Golden Rod,” Tonic Studios - Nuvo Collection - Glimmer Paste -”Emerald Green,” Sizzix Big Shot Machine, Wagner Heat Tool, Ranger Ink Gold Tinsel Embossing Powder, Heidi Swapp Gold Lame” Color Shine, Ranger Ink Distress Stain Spray-“Peacock Feathers” and “Picket Fences

Tuesday, June 27, 2017

CAS(E) this Sketch #227

Happy Tuesday!! Busy day here. Had to go to the dentist today to get measured for a retainer. Who knew at 48 that my teeth would start moving and I would need worry about my teeth shifting back to a pre-braces spot. I feel like a teen again!!

I also had to bring Zack to the vet. He has not been himself as of late. We are no sooner outside on a walk when he starts panting and cannot keep up with us. (He has been trained to walk by our right side.) Zack also limps a little when he gets up.

He is at least 9 (not totally sure because he is a rescue dog) and I know things do get slower with age. I just don't like to see him like this. They gave him some antibiotics and hopefully these will help make him feel better.

Enough about life!!

Today I am sharing a card I created for CAS(E) this Sketch Challenge #227. This came together quick because most of the supplies were right on my desk.


I started off by covering a white, A2, top folding card with a scrap of patterned paper. I then layered a rectangle I had embossed over the front, as per the sketch below.


Next I die cut three frames out of white card stock using My Favorite Things "Pierced Rectangle" frames dies. I adhered them together and placed them over the top of the embossed paper.


I then stamped a sentiment from My Favorite Things "Geometric Greenery" onto a white banner that I had die cut using MFTs "Fishtail Flags Frames" Die-namics. I added it to the card front using foam adhesive.


I adhered a white Simon Says Stamp "Tiny Tags" die cut that was on my desk over the flag and covered that with a Memory Box's "Rhone Butterfly Wings" that I had die cut for a previous project and never used.


To finish off the card, I covered the body and the wings of the butterfly with "Spectrum Noir Clear Sparkle Marker." I thought that the body melted in to the butterfly a bit too much so I then covered it with Diamond” Stickles.

That is all from me today. I thank you for taking the time to stop by. Have a FABULOUS day!!


Supplies:
Stamps-My Favorite Things “Geometric Greenery
Paper-Neenah Solar White, My Mind’s Eye “Meadowlark” patterned paper
Dies-Memory Box “Rhone Butterfly Wings,” My Favorite Things “Fishtail Flags Frames” and Die-namics “Pierced Rectangle” Frames, Simon Says Stamp! “Tiny Tags” (retired)

Other-Sizzix “Big Dots” Embossing Folder, Sizzix Big Shot Machine, “Diamond” Stickles, Adhesive Foam,

Wednesday, June 7, 2017

Inspiration With CAS-ual Fridays Stamps "I Believe in You"

Happy Hump Day!! I hope you are having a FABULOUS week!!

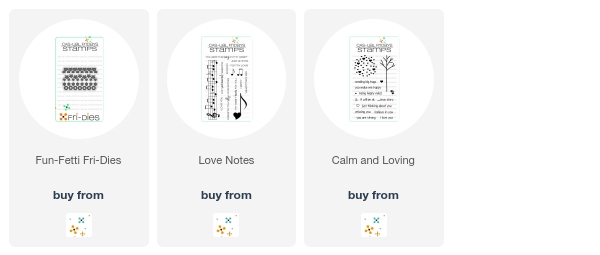
Today it is my turn over at CAS-ual Fridays Stamps Blog. I created a card using the "Love Notes" and "Calm and Loving" stamp set.


I started off by stamping and embossing the music from the "Love Notes" set in gold onto a white card base. I then adhered it to an A2, Kraft card base.


Next I used the heart circle from the "Calm and Loving" set and heat embossed that in gold on a watercolored red paper. I die cut it out and punched a heart out of the middle. I adhered the heart onto a white base circle and then used foam adhesive to pop the negative part over it.


I then heat embossed a sentiment from "Calm and Loving" onto a black card stock strip and adhered it over the circle. My last step was to die cut some hearts from gold paper using the "Fun-Fetti Fri-Dies" and adhering them onto the card front.

Simple and easy-something I rarely do!!

Don't forget that if you use my code-nora2017-you can get 15% off your next order at the CAS-ual Fridays Stamps Store.


There are a ton of clearance items over at the store and you can use my code to get extra money off!!

Thank you for stopping by. Have a WONDERFUL day!!

CAS-ual Fridays Stamps Supplies:

Sunday, March 26, 2017

CAS-ual Fridays Stamps Sneak Peek "Floating"

Happy Sunday!!  I hope you are all having a nice weekend. Today is my husband's birthday. We celebrated last night at a French Restaurant  that he wanted to try. Everything was delicious-especially the profiterole I had for dessert!!

Today I am excited to bring you a sneak peek to "Floating" one of the new CAS-ual Fridays Stamp sets that will be released on March 31, 2017.


I had fun creating a simple card with it this weekend. I should not call it simple, though, because it took me over an hour to color!!


I started by stamping the balloon from the set onto a piece of white card stock. I then used Copic Markers to color in all the different flowers, as well as the basket.


I then took a brush and lightly brushed Distress Ink in "Tumbled Glass" around the background for sky. I apologize for the photo as it is pretty gloomy here and hard to get a great photo.


I mounted the stamped panel onto an A2, top folding aqua card and added a sentiment that I had embossed onto a piece of black card stock.


Next I used Glossy Accents, Stickles and Nuvo Crystal Drops inside the flowers to give them a bit of zing.

Like this sneak peek? There will be more from the Ink Squad all this week with the rest of the release.


On Friday, we will have a blog hop and every designer will use a new CAS-ual Fridays Stamp set in their designs. There will be prizes, fun projects and special guests. Please join us at the CAS-ual Fridays Blog for all the festivities!!

I thank you for stopping by today. Have a  FABULOUS day!!

Supplies:
Stamps-CAS-ual Fridays Stamps "Floating"
Paper-Neenah Solar White, PaperTrey Ink "Aqua Mist," and Bazzill Black
Ink-Memento "Tuxedo Black," and Hero Arts Unicorn "White" Pigment Ink, Ranger "Tumbled Glass" Distress Ink
Other-Wagner Heat Tool, Sizzix Big Shot, Wow Opaque White Embossing Powder, Stickles in "Cool Mint" and "Glam Pink," Nuvo Crystal Drops in "Dandelion Yellow," "Red Berry," and "Ripened Pumpkin," Glossy Accents, 3M Foam Adhesive, Ranger Multi-Matte Adhesive, Scotch Dot Adhesive, Ink Duster Blending Brush
SaveSaveSaveSave

Sunday, March 5, 2017

PTI Make It Monday #276 and Freshly Made Sketches #277

Hello everyone!! I hope you all are having a fabulous weekend. Cannot believe it is late Sunday afternoon. It sure goes by fast.

Charlotte and Chris were away at a robotic competition so I had the weekend to myself. I never mind the first day but two whole days in a row without anyone home I start to miss them. I think my dog does too because he wants constant attention!! It does not help that Chris was away on business this week so he didn't get any Daddy time.

Since I had a block of time yesterday, I made a bunch of cards. I will be sharing three with you today.

The first two are for PaperTrey Ink's "Make It Monday Challenge #276." Melissa Phillips challenged everyone to use colored pencils on kraft paper.

For my first card, I heat embossed PTI's "Botanical Blocks" with gold and used Prismacolor Pencils to color the image in.


I am going to apologize for my photos. They are quite dark and I could not get them any lighter. I need a better lighting system then I have right now. I actually took all the cards I made this weekend and photographed them in three different locations to see if I could get better lighting and wound up back with my light box!!

I layered the Kraft card stock over some "Lemon Tart Bitty Dot" (retired) patterned paper that I had die cut using PTI's "Basic Bookmark #3" die.


I wrapped a bit of jute around the top and then used Scrapbook Adhesive Foam to pop the panel up over an A2, top folding notecard that I had covered in Basic Grey patterned paper. I could not photograph the effect but my last step was cover the flower with Spectrum Noir Clear Sparkle.

My second card I created for this challenge I used PTI's "Botanical Blocks II" stamp set. I actually like this card better then the first.


I started off in basically the same way by heat embossing with Ranger Gold embossing powder but then die cut the panel using the matching dies.


I stamped a sentiment from PTI's "Bitty Butterflies" set onto a top folding A2 card using Hero Arts "Lavender" ink. I then layered a gold panel in the middle of the card stock.


I finished the card off by using Scrapbook Adhesive Foam to adhere the Kraft panel over the gold. My last step was to cover the flower with Spectrum Noir Clear Sparkle Marker.

The last card I created I used Freshly Made Sketches #277 as my inspiration.


I started off by stamping Art Impression's "Celeste" stamp onto white card stock and coloring in with Copic Markers.


I enhanced the image by using Wink of Stella in "Clear" and "Gold," and covered the bracelet and the wine with Glossy Accents.


I die cut the panel using an MFT "Blueprint #13" die-namics and  layered the panel over an "Aqua Mist," A2, top folding card. I added the black embossed sentiment strip using foam adhesive.


The last touch was to add a few clear sequins. I also stamped the envelope (as well as the inside which I forgot to photograph) using Paper Smooches "Free Spirit" stamp set.

I had fun making all these cards this weekend. I want to thank you for stopping by today. Have a great night!!

Nora

Make it Monday Card #1
Supplies:
Stamp- PaperTrey Ink "Botanical Blocks"
Paper- Paper Studio "Kraft," PaperTrey Ink "Lemon Tart Bitty Dot," Basic Grey "Fiction" and PaperTrey Ink "Aqua Mist"
Dies-PaperTrey Ink "Basic Bookmark #3"

Make it Monday Card #2
Supplies:
Stamps-PaperTrey Ink "Botanical Blocks II" and "Bitty Butterflies"
Paper-Paper Studio "Kraft" and Stampin Up! "Pistachio Pudding," Tonic Studios "Metallic Mirrored Card Stock"
Ink-Delicata Golden Glitz and Hero Arts "Lavender
Dies-PaperTrey Ink "Botanical Blocks Basics Die" and MFT "Blueprints #13"

Freshly Made Sketches Card
Supplies:
Stamp-Art Impression "Celeste," Art Impressions "Wine Tasters" stamp set, Paper Smooches "Free Spirits"
Paper-PaperTrey Ink "Aqua Mist" and "True Black," Copic Mini Pack of Paper
Dies-My Favorite Things "Blueprints #13"
Other-Clear Sequins, Ranger Multi-Matte, Glossy Accents, Wink of Stella Clear and Gold markers, Ranger "White" Embossing Powder, Sizzix Big ShotWagner Heat GunScrapbook Adhesive Foam, Copic Markers


SaveSaveSaveSaveSaveSaveSaveSaveSaveSaveSaveSave